
I totally want to see what kind of decor will be at this wedding!
It’s stationery time! Okay, I may have said that like a Power Ranger. Please don’t judge me.
If you’re anything like I was, you’ve already researched so many vendors that you feel like your head might explode. I’m here to make the wedding stationery process as easy as possible, and I think that starts with a little help learning the various printing and design terms of stationery.
But it’s not scary, I promise! I’ve wanted to share this with my brides for a long time, but I never had a good way to do so without looking like I was a teacher prepping them for a pop quiz. So here we go: the Wedding Stationery Terminology 101 blog post!
Below are the terms and phrases I use most often for my Sablewood brides, but it’s entirely possible that you’ve heard others. This is in no way a comprehensive list of paper, types of printing, stationery pieces, etc., but it’s a good starting point!
This is going to be a long one. Feel free to click a link in the index below or search the page using the “Find” search option shortcuts (cmd+f (Mac) or ctrl+f (PC))
- WEDDING STATIONERY : Invitation Suite | Invitation | Reply Card | Reply Envelope | Inner Envelope | Outer Envelope | Details Card | Reception Card | Envelope Liner | Meal Selections Card | Map Card | Rehearsal Dinner Invitation | Welcome Dinner Invitation
- ADDRESSING + MORE : Guest Addressing | Calligraphy | Return Addressing | Return Address Stamp | Belly Band | Wax Seal | Venue Illustration | Vintage Postage | Postage Rates | Square or Unusual-Sized Envelopes
- PRINTING TERMS : Flat (Digital) Printing | Foil Printing or Foil Stamping | Letterpress | Embossing | Blind Embossing/Letterpress | Thermography | Bleed | Die-Cutting
- PAPER TYPES : Deckle Edges | Paper Weight | Handmade Paper | Cotton Paper | Smooth Cover Paper
- CALLIGRAPHY + OTHER TOUCHES : Watercolor Wash | Pointed Pen Calligraphy | Spot Calligraphy | Brush/Watercolor Calligraphy/Lettering

the tradition suite is full of beautiful calligraphy, a custom venue illustration, and more
Wedding Stationery
Invitation Suite: Usually comprised of (at the very least) an invitation, reply card and corresponding envelope, and an envelope to mail your pieces in. Traditional invitation suites may have an invitation, reply card and corresponding envelope, details card, reception card, inner envelope with a liner, and an outer envelope for mailing all of the aforementioned pieces. More modern additions to invitation suites include meal selections, map cards, and welcome dinner information.
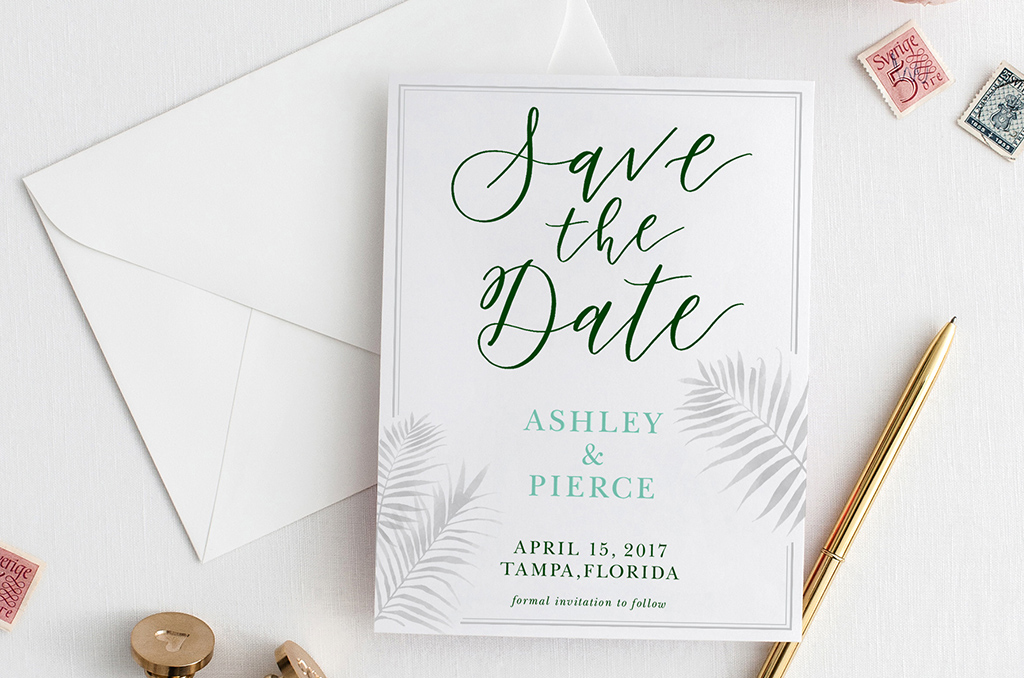
Invitation: Sure, you know what a wedding invitation is. It’s easily the most important part of your wedding stationery and the one piece that absolutely cannot be left out…mostly because it’s how your guests find out the really big pieces of information (date, time, attire, location…who exactly is getting married…) It can be fun and flirty, formal, minimalistic, embellished with various printing types (more on that later) and more – it’s all up to you! Your invitations are the best way to showcase your wedding’s personality.
Traditionally, reply cards are mailed back in an envelope provided by you with a stamp applied already. However, you can also design your reply cards as postcards with stamps already applied to them!
Inner Envelope: Inner envelopes are a nice, traditional touch to your invitations. The inner envelope is addressed to the guests invited to the wedding. If you’re having an adults-only wedding, address the envelope to Mr. and Mrs. John Smith; a kid-friendly wedding will be addressed to The Smith Family.
Outer Envelope: Time for another history lesson! Before those cute little trucks, mail was delivered by horse and buggy. And because the mail was exposed to the elements — think mud, rain, dust from the road, bird droppings, and more — the contents of the letters needed to be protected by an envelope that could withstand the rigors of mail delivery. Outer envelopes had the guest addresses on them to direct the mailman, but they were removed and discarded before handing over the contents to the butler: a crisp, white inner envelope containing all of the invitation details, untouched by the elements.
Today, the tradition of outer envelopes continues (despite more modern means of mail delivery) and its presence in the wedding stationery industry remains strong. They’re not only used for formal affairs but all types of weddings, as the modern day post office sorting machinery is sometimes almost as damaging as old-world mail delivery.
Beyond the practical use, utilizing an inner and outer envelope is timeless.
Details Card: This little card lets your guests know where the ceremony and reception will tare place, what hotel you might have set aside a block of rooms at, transportation details, and possibly directions.
Reception Card: If your reception will be held at a different location from your ceremony, or if you have more than 30 minutes or 1 hour between your ceremony and reception, it might be a good idea to include information about location, parking, and travel details of this next stop in the wedding celebration.
Envelope Liner: Envelope liners are making a comeback, and for good reason: it’s an elegant and relatively inexpensive way to dress up your invitations. The Clara Suite, for instance, is a very minimalistic invitation design, but adding an envelope liner with florals or stripes can add a bit of color and excitement without going overboard.
Create a meal card your guests can include with the reply card (or put it on the back of the reply card) to ensure you get the correct head count for your guests and their meals. If you’re doing a separate card, don’t forget to include the need-by date!

map cards are a new way to add some character to your invitations
Map Card: These are a fun twist to add to your wedding invitation suite! Map cards are stylized drawings, illustrations or sketches of points of interest around your wedding. Some couples include a map of the world, highlighting some of their favorite places to visit, but most opt for a more focused map. Try to choose 3 or 4 locations that mean something to you as a couple (bonus points if they also have something to do with your wedding event, like a museum guests can visit or the hotel most of your attendees will be staying at.
I’ll use the map card from the Clara Suite (above) as an example: the wedding ceremony and reception will take place at Church Street Station in Orlando, but what else is around for guests to enjoy? The Grand Bohemian is the couple’s hotel of choice for room reservations, plus the architecture is unmistakeable and breathtaking, so that earns a place on the map. As a former Orlando resident myself, I suggested Lake Eola as another spot to feature – there are adorable swan paddle boats to canoodle in and the walk around the lake is just long enough to really enjoy. Church Street is famous for its nighttime scene, which is perfect for post-wedding festivities.
Map cards are so much fun to make and can be as detailed or simple as you want! Watercolor adds a fun dimension to the piece as well. Get your map with foil stamping or letterpress and boom! You and your guests now have a gorgeous piece to reminisce about.
Rehearsal Dinner Invitation: These will either go in every guests’ invitation suite, or will be included only in the suites of the guests invited to the rehearsal dinner. Alternatively, you can mail a separate invitation for this at the same time that your wedding invitations go out. Depending on your wedding and budget, you can invite only immediate family and the bridal party, add out-of-town guests, or invite anyone you wish. Traditionally, the parents of the groom pays for this event, so be sure to talk it over with them before ordering these invites.
Welcome Dinner Invitation: This is so similar to a rehearsal dinner invite, it should almost be in the same category. If you’re opting for a more informal welcome dinner rather than a rehearsal dinner, it might be in your best interest to get some of these designed. These will either go in every guests’ invitation suite, or will be included only in the suites of the guests invited to the welcome dinner. Alternatively, you can mail a separate invitation for this, just as you would a rehearsal dinner invitation.

venue illustrations can be used for your invitations and as home decor
Addressing + More
Guest Addressing: This is pretty straightforward. Your guests names and addresses will go on the outer envelope or the single envelope you use to mail your invitations. Guest names only will appear on the inner envelopes.
Calligraphy: Calligraphy has been a long-standing tradition for wedding invitations for many years (calligraphy itself has a very long history dating back to before the fall of the Roman Empire). There are many styles of calligraphy, but oftentimes what you see today is Copperplate (traditional) and a more contemporary, loose style called modern calligraphy (that’s what I do!).
The important thing to remember about calligraphy is that no font can mimic it. Calligraphy is special because of the calligrapher’s skill, the way the ink sits on top of the paper, and the beautiful letterforms made by an actual person. Full calligraphy for an entire suite and envelopes may not be in every budget, but every suite can incorporate calligraphy.
Return Addressing: Return addresses can be found in two places on the invitation suite: on the back of your outer envelopes and on your reply envelopes. The return address is your address (or, you know, the address of whoever is taking your RSVP’s!) and can be done in modern calligraphy or with a return address stamp.
Return Address Stamp: This is a more budget-friendly option for brides who want calligraphy without the cost. I design custom return address stamps that are applied to both your outer and reply envelopes and you get to keep the stamp for any mailings you do from there on out! Most return address stamps utilize modern calligraphy or a font that matches your invitation suite.
Belly Band: Gone are the days when belly bands were only paper or silk ribbon! Now, belly bands – which wrap around your invitation suite to hold multiple pieces together – can be paper, hand-dyed silk ribbon, lace, twine, vellum, artificial foliage…if it can be tied and is relatively flat, you can use it as a belly band. Talk about options!
Wax Seal: If you’ve looked around my site, you already know about my love affair with wax seals. They’re primarily used to seal the inner or outer envelope with a special imprint, but can also be used to seal belly bands, as an accent piece on menu or escort cards, or as a decorative addition to a wedding favor. The best part? They look super expensive and elegant, but they’re actually very affordable! Check out my options for custom and stock wax seals.
Venue Illustration: Exactly what it sounds like, venue illustrations are a fantastic way to give your guests a glimpse of your ceremony or reception location. Above is a print version of a venue illustration, but many brides opt to include their venue illustration on their invitations, on their envelope liner, or as a vellum overlay. These can be beautiful as black and white ink drawings or with added watercolor.
Vintage Postage: Vintage postage has really picked up steam in the last couple of years. After you weigh your full invitation suite within the envelope and establish the amount of postage you need, you can look into vintage postage options. There are so many types of old stamps out there (make sure to get the unused postage, not cancelled!) that can make your envelope stand out in a sea of bills and junk mail.
This option is slightly more expensive than regular postage depending on the types of stamps you get. You might pay $.70 to mail your invitation with a current USPS stamp, but the same invitation may cost $1.20 to mail with vintage postage. It’s worth it, though – vintage stamps add such a unique and personal touch to your envelopes and will make your guests feel super special.
Postage Rates: First things first: your invitation suite, celebration invitations, etc. do not include postage in the price. Most invitation suites weigh in at the $.70 per piece / 2 oz. letter size, but that’s all up in the air depending on the type of paper you use, how many pieces are included, the shape and size of your invitations, etc.
I know that’s a little scary sounding, but I promise I’ll warn you if I think your piece may require extra postage. I can tell you right now that the ever-popular square envelopes do incur an additional postage fee, which I’ll go over below!
Square or Unusual-Sized Envelopes: Who doesn’t love square envelopes? In a world where square photos rule – looking at you, Instagram – it’s no wonder that we all enjoy a good irregular-shaped envelope. Well…everyone except the machines at the post office. Because square envelopes are an irregular shape and can’t be read by the sorting machines at the good ol’ post office, they’re deemed unmachineable…which will set you back an extra $.20 per ounce in postage. Keep that in mind when selecting your pieces and paper!

foil printing and deckle edges are a dream come true
Printing Terms
Flat (Digital) Printing: Flat printing is by far the most used method of printing in the world of wedding stationery. It’s affordable for pretty much every budget, can accommodate small (under 25 invitations) and large print runs (think several hundred invitations) and you can get some drop-dead gorgeous invitations with this method. Chances are that most wedding invitations you’ve received in the past have been printed digitally.
Foil Printing or Foil Stamping: This isn’t the kind of foil that you can do at home with a laminator. This is the good stuff and the type of printing that tells me you’re serious about your invitations. The parts of your invitation that you want to be foiled are sent off to be made into printing plates.
From there, your foil color of your choice is sandwiched between the plate and your paper…then imprinted using a really cool heating technique. It’s awesome. If you ever have a chance to see hot foiling/stamping or letterpress done, do it. You’ll have a whole new appreciation for the price tag attached.
Letterpress: Letterpress is similar to foil printing in that a special plate is made with your invitation (or other piece). But that’s pretty much where the similarities stop, because letterpress is so cool.
Instead of pressing foil into the paper, you press ink. The result is depressed letters or designs in the paper, and there are a bunch of options for both solid and gradient colors. Traditionally, letterpress is produced on thicker cardstock to allow for the impression in the paper to show. There is (almost) no wrong way to use letterpress.
Love the look of letterpress but it’s not really in the budget? There are a few different ways to save on letterpress pricing! Try single color letterpress (think black text on white paper, yum!) or highlighting certain words in letterpress, like your names on your invitations!
Embossing: Think about a nice hardcover book jackets – have you ever run your fingers across the raised letters there? That’s embossing. The paper itself is raised on the front and depressed on the back. It’s basically the opposite of letterpress and is pretty cool itself!
Blind Embossing/Letterpress: This is one of my favorite styles of printing. It’s basically letterpress without the ink, meaning you get an impression in the paper but that’s it. With the right design, your invitation can sport some very cool textures and really becomes an experience. Your guests won’t be able to stop running their fingers over your invitations.
Thermography: Thermography is kind of like embossing, except that instead of the paper being raised, the ink is. Have you seen those videos of people using embossing powder that is then heated with a heat gun, and it melts the powder into a smooth surface? That’s the DIY version of thermography. Professional thermography is one hundred times more accurate than DIY “embossing”. In this case, it’s definitely best to leave it to the professionals.
Bleed: Bleed refers to the text or images that “fall” off the page. Pick up a magazine and check out the ads for perfume or clothing – you’ll see how the images extend to the edge of the page, with no border.
Die-Cutting: When your piece isn’t a rectangle or square, chances are it will need to be die-cut because it’s a special shape. Laser cut paper invites fall into this category, too. There are some really great way to incorporate die-cutting into your invitation, but as all special types of printing, you’ll have to pay a little more for this service.

just look at that texture! handmade paper with natural deckle edges are so gorgeous!
Paper Types
Deckle Edges: When you have paper with a deckle edge, you’ll get something that looks like the photo above. Torn edges have always been associated with paper making; until the 19th century when more modern methods of producing paper were invented, you weren’t able to get paper without a deckle edge. Today, books and invitations with deckle edges harken back to a time when paper was very valuable. Adding a lovely torn edge to your pieces is always a good idea.
Paper Weight: Most of my brides are always a little in the dark about paper weight, and you know what? That’s okay! My most popular paper weights are 110lb., 130lb. and 220lb. paper. But what does that mean? Paper weight is established by how much a stack of 500 sheets of paper weigh. If that sounds like a lot, it is – depending on the paper you have. If you have a run of the mill printer at home or at work, chances are that you use 20lb. copy paper to print on. That means that 500 sheets of your copy paper weighs 20 lbs. Still with me?
So let’s move on to how it applies to your invitations. Wedding invitations are important pieces of paper, and therefore shouldn’t be printed on cheap, 20lb. paper. The heavier the weight, the thicker the paper, and the nicer your invitations will look and feel. The type of paper you use will also dictate what types of printing you can utilize for your invitations. For example, thicker paper is best for letterpress while 110lb. paper is more suited for digital printing and foil printing.
How does this factor into mailing and postage? The thicker the paper, the more your invitation suite will weigh. Remember that postage is calculated by weight and most invitation suites weigh about 2 ounces. Now, choosing a letterpress invitation on 220lb. paper isn’t going to send you over the 2 oz. average weight, but if you also have a reply card, details, map card, and reception invitation letterpressed on 220lb. paper – you might be getting close to paying a bit more per piece. It depends on the size of your invitation suite pieces.
Handmade Paper: Until you hold handmade paper yourself, it’s difficult to really convey how incredible it is. The texture is unlike anything we experience on a daily basis (unless you’re a calligrapher!) and it’s simply breathtaking. The handmade paper I source is cotton rag created painstakingly using a screen. Each piece is inspected before any printing is done. Envelopes made from this paper is also available to create a seamless look. Holding a complete invitation suite with this paper is such a unique experience, as you can feel the care and expertise in each piece.
Handmade paper is some of my favorite to work with, but it can be tricky. While digital printing on handmade paper is challenging but do-able, foil and letterpress printing on handmade paper requires an expert and can carry a hefty price tag if you want all the bells and whistles. Those are the more expensive options, of course; handmade paper isn’t astronomical in price. And trust me: it’s worth every penny.
Cotton Paper: Not to be confused with handmade paper, the 100% cotton paper I use for my invitation suites has perfectly straight edges (which can be deckled to mimic the handmade look!) and has significantly less texture than handmade cotton rag. It still has a wonderful feel to it, however, and has far more heft than even the card stock varieties you find in a craft store.
Smooth Cover Paper: Smooth cover paper is one of my most popular paper choices. The paper is (what else?) smooth and almost like satin, but it isn’t frilly. You can use this as a coated piece of paper for a crisp, high quality print, or use an uncoated paper for a softer, more romantic look.

Calligraphy + Other Touches
Watercolor Wash: A watercolor wash is a wide swath of watercolor over a given area. It’s very popular right now and can be seen everywhere from wedding invitations to logos to product tags. Watercolor washes can be comprised of a single color or multiple colors for a gradient effect.
Pointed Pen Calligraphy: Pointed pen calligraphy is the traditional method of calligraphy, involving a nib, holder, and ink that the nib is dipped into. Weddings and calligraphy go so well together because calligraphy has long been associated with letter writing (a rather romantic notion today!) and invitations to balls, weddings, and other celebrations.
Spot Calligraphy: Spot calligraphy is calligraphy only in certain areas of a piece. The semi-custom suites are perfect examples of spot calligraphy utilization: only certain words and phrases are written in calligraphy, drastically reducing the amount of time and cost involved in creating your invitation. If you love the look of calligraphy but don’t want every line written on your invitation written in calligraphy (or it’s not in your budget), then spot calligraphy is for you. Don’t forget to check out the return address stamps as well, which also feature spot calligraphy!
Brush/Watercolor Calligraphy/Lettering: Brush calligraphy and brush lettering are created using…a brush! Surprise, right? Because a brush is used instead of a pen or calligraphy nib, the result is often more loose and less formal than other types of lettering. It’s a favorite for every type of wedding, however! And with the option of using multiple colors, you can achieve a fun, gradient effect that really stands out!
If you read through this whole post…you rock. Please use it as a reference when you’re talking stationery and don’t hesitate to ask me any questions about anything! I’m pretty passionate about printing, paper, and calligraphy.
What other printing methods or types of wedding stationery are you interested in that I didn’t cover?
xo,
Holly
social:
Gallery
Shop
Mentoring
Contact
Services
email:
hello@sablewoodpaper.com
proudly serving and celebrating
all couples in love


About
about sablewood
blog
open positions
social:
About
Gallery
Shop
Mentoring
Contact
Services
email:
hello@sablewoodpaper.com
The license shop
weddings + gifts
shop dorabird
wholesale
proudly serving and celebrating
all couples in love
social:
About
Gallery
Shop
Education
Contact
Services
email:
hello@sablewoodpaper.com
video mentoring
digital education
proudly serving and celebrating
all couples in love


[…] Vintage postage has made waves in the stationery world over the last several years, and it’s no wonder. As you can see from the photo above, a kind of collage of stamps is made on envelopes, giving the piece an old-world-romance feel. […]